
- Step 1: Open the Templately App
- Step 2: Give Your Prompt to Templately AI
- Step 3: Choose Your Template
- Step 4: Generate Website Content & Replace Images with AI
- Step 4.1: Add Your Business Name
- Step 4.2: Select Your Industry
- Step 4.3: Add Business Details
- Step 4.4: Add Your Email Address
- Step 4.5: Add Your Contact Number
- Step 4.6: Add Your Business Address
- Step 4.7: Add Your Opening Hours
- Step 4.8: Select Your Language
- Step 4.9: Replace Images with AI
- Step 4.10: Save and Generate
- Step 5: Generate Logo with AI
- Step 6: Style Your Website
- Step 8: Connect Your Site
- Final Outcome
With the Templately App, you can now generate AI-powered websites. You simply have to describe your website in a prompt and the Templately AI will suggest matching templates, generate your content, images and logo, and let you connect the finished site directly to your domain, all without opening your WordPress dashboard first.
In this documentation, you will find a step-by-step process for generating an AI-powered website within minutes.
Note: You need to log in to your Templately account before you start. Some suggested templates may be PRO-only; make sure you have an active PRO subscription if you want to use those.
Step 1: Open the Templately App #
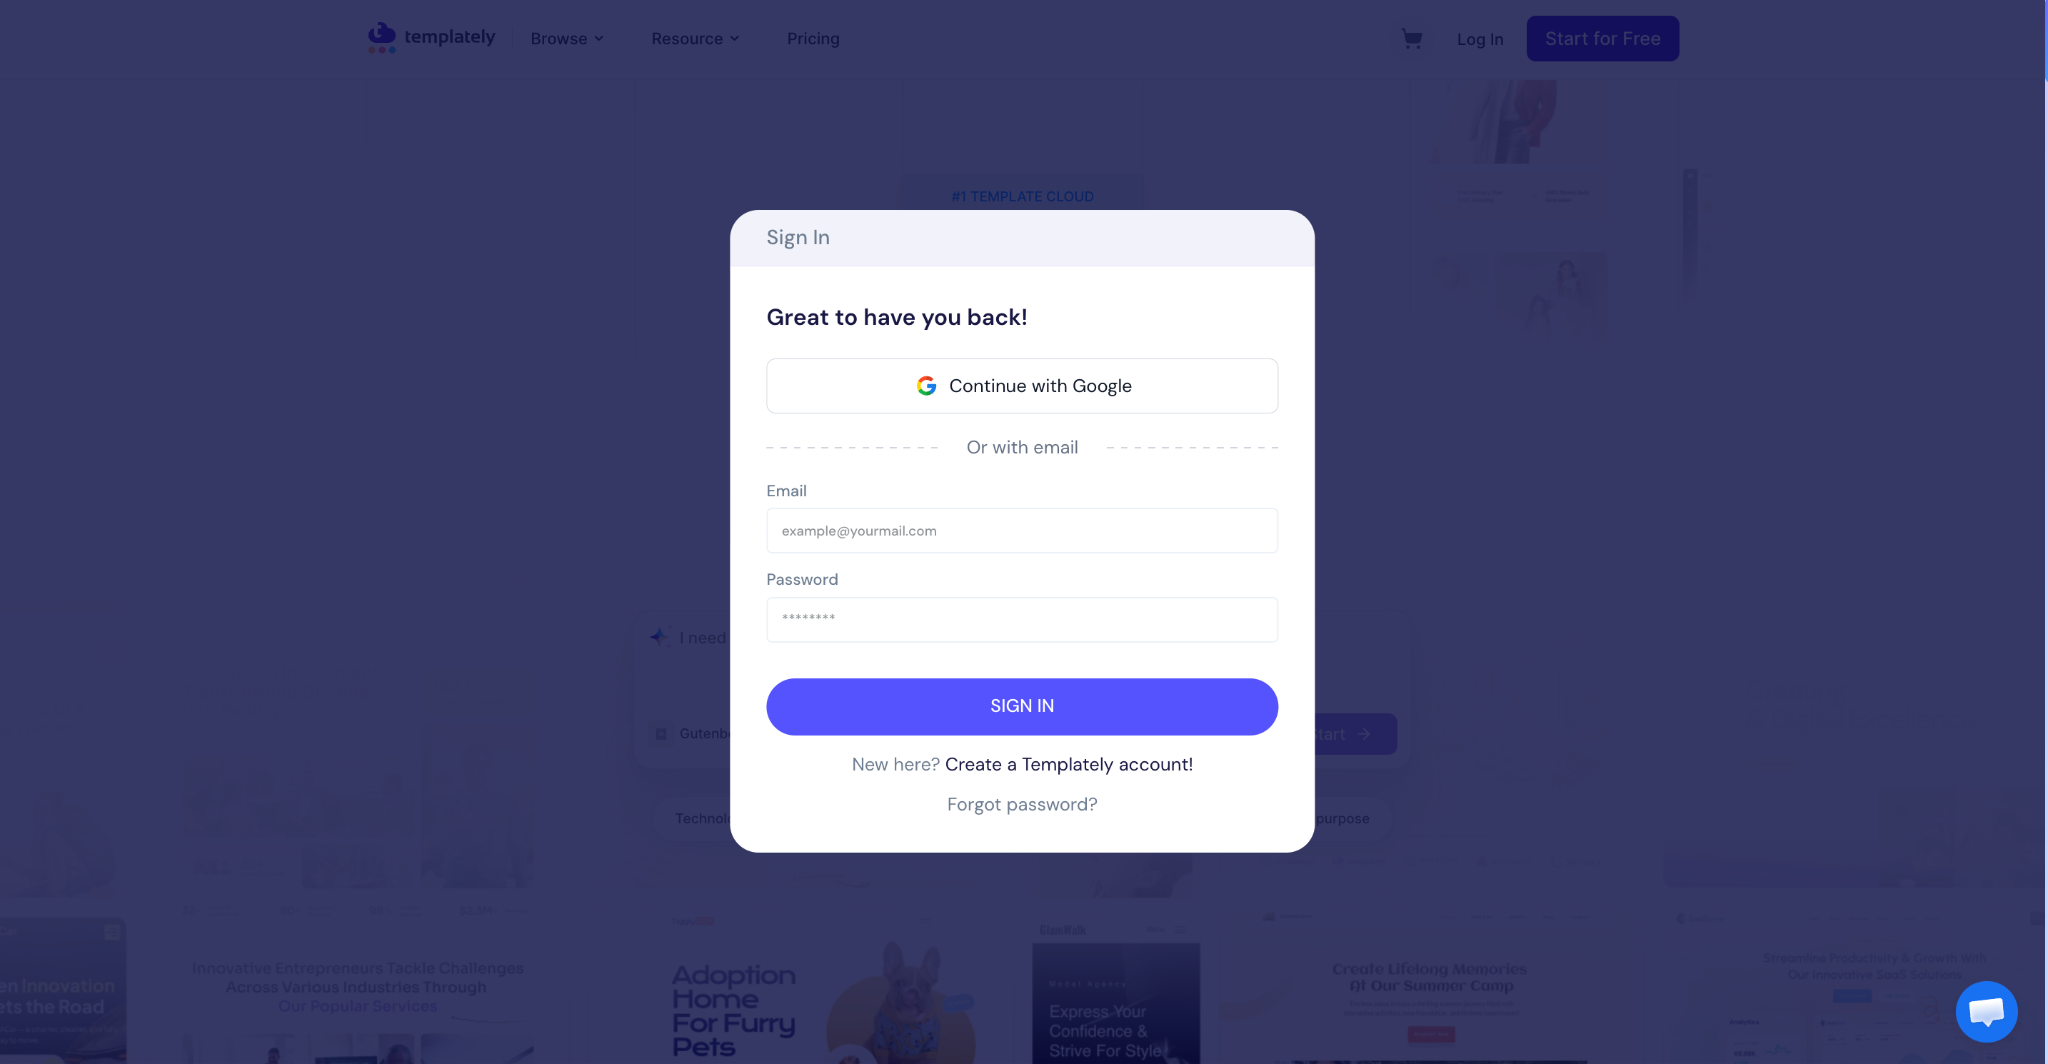
Launch the Templately App and log in with your account credentials. If you don’t have an account yet, refer to the account creation documentation first.
Step 2: Give Your Prompt to Templately AI #
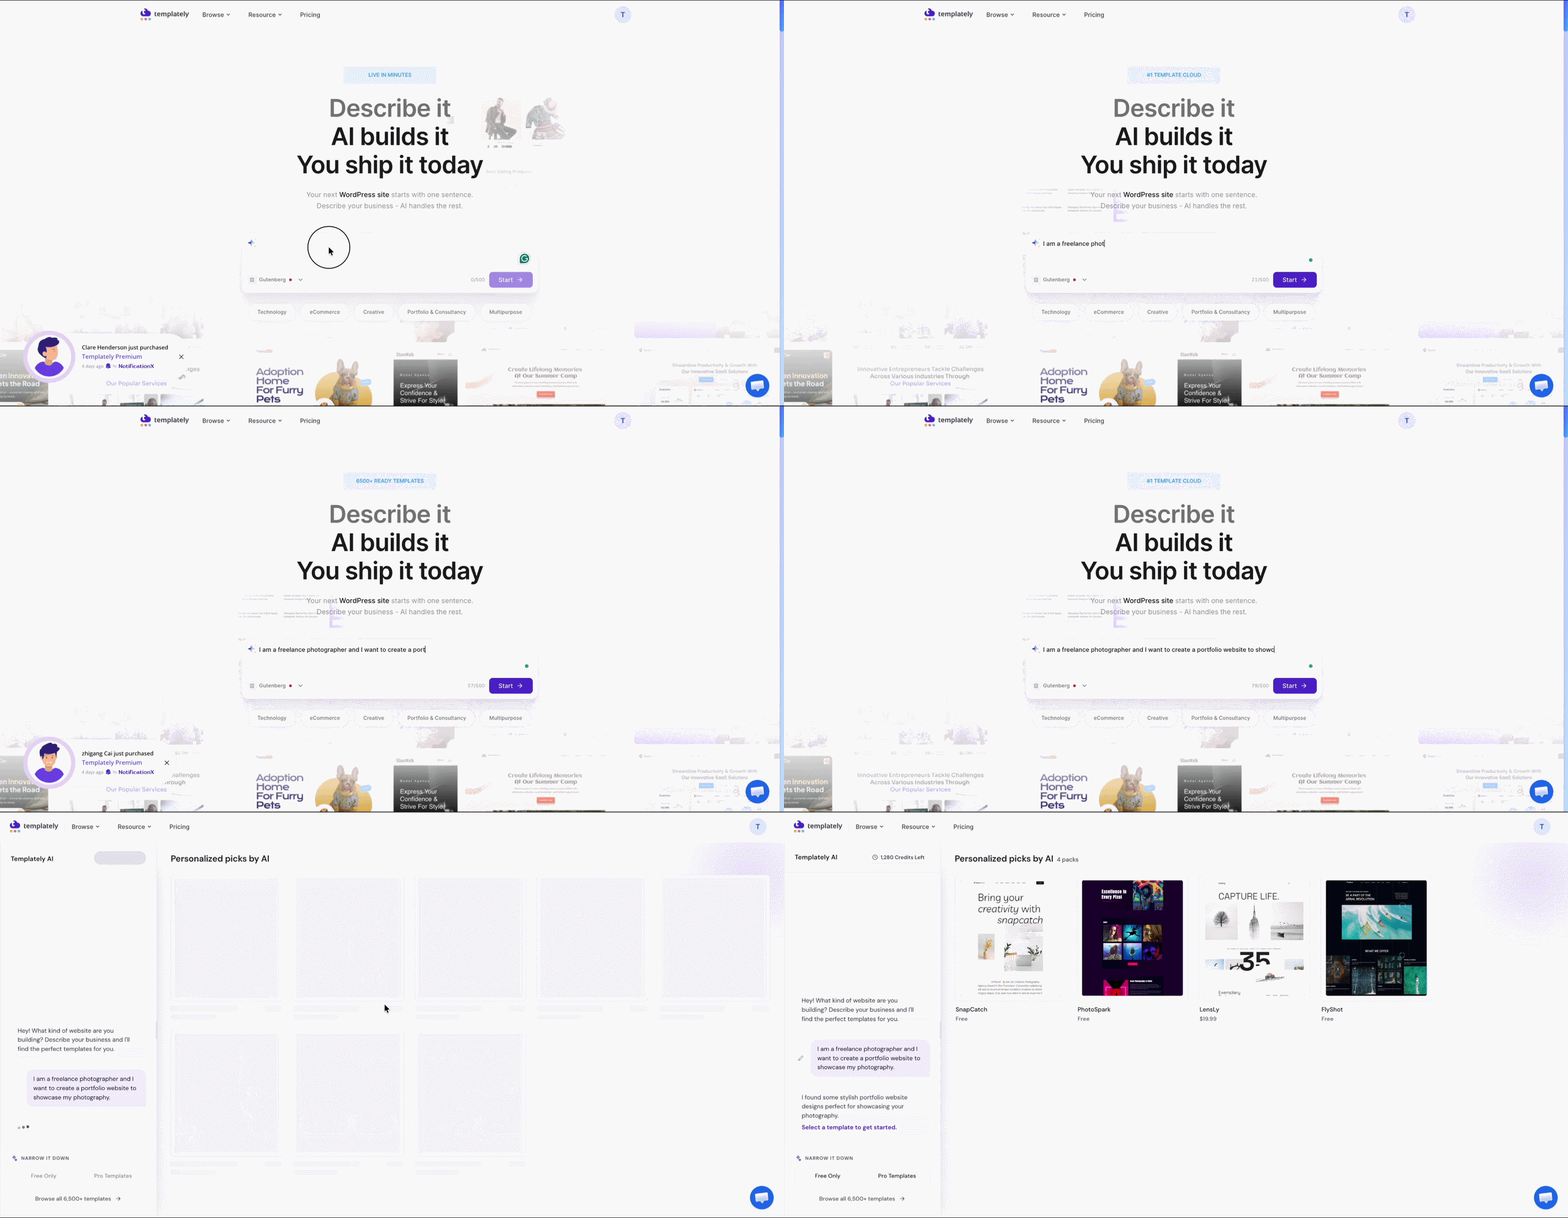
On the app’s home screen, type a single prompt describing the website you want to build, for example, your business type, industry, or the purpose of the site.
After you submit your prompt, Templately AI does not just return results right away; it starts a conversation with you. It asks a series of follow-up questions to better understand your requirements before suggesting templates. Answer these questions as they come up in the chat.
Step 3: Choose Your Template #
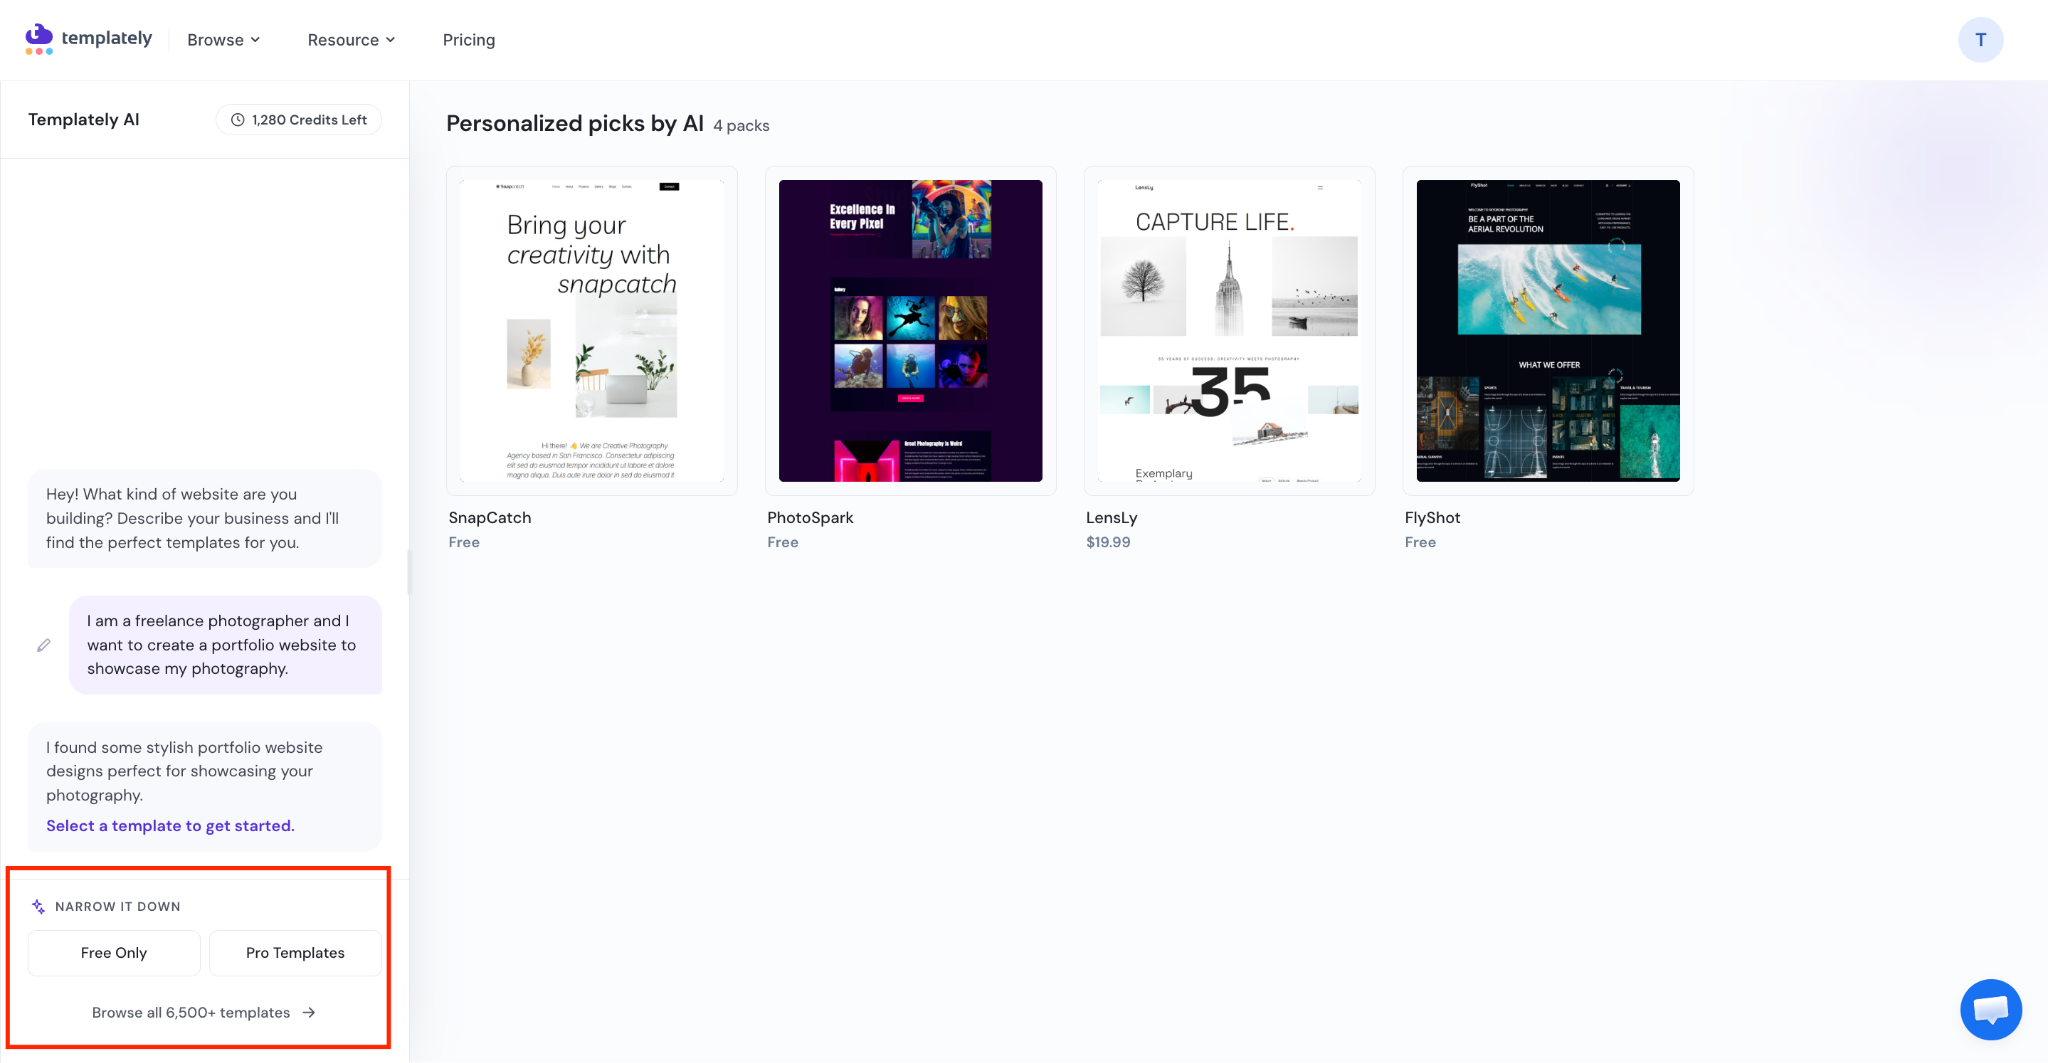
From the suggested results, select the template you want to build your website with.
- Free templates: available to all users, no subscription required.
- PRO templates: require an active Templately PRO subscription to use.
Step 4: Generate Website Content & Replace Images with AI #
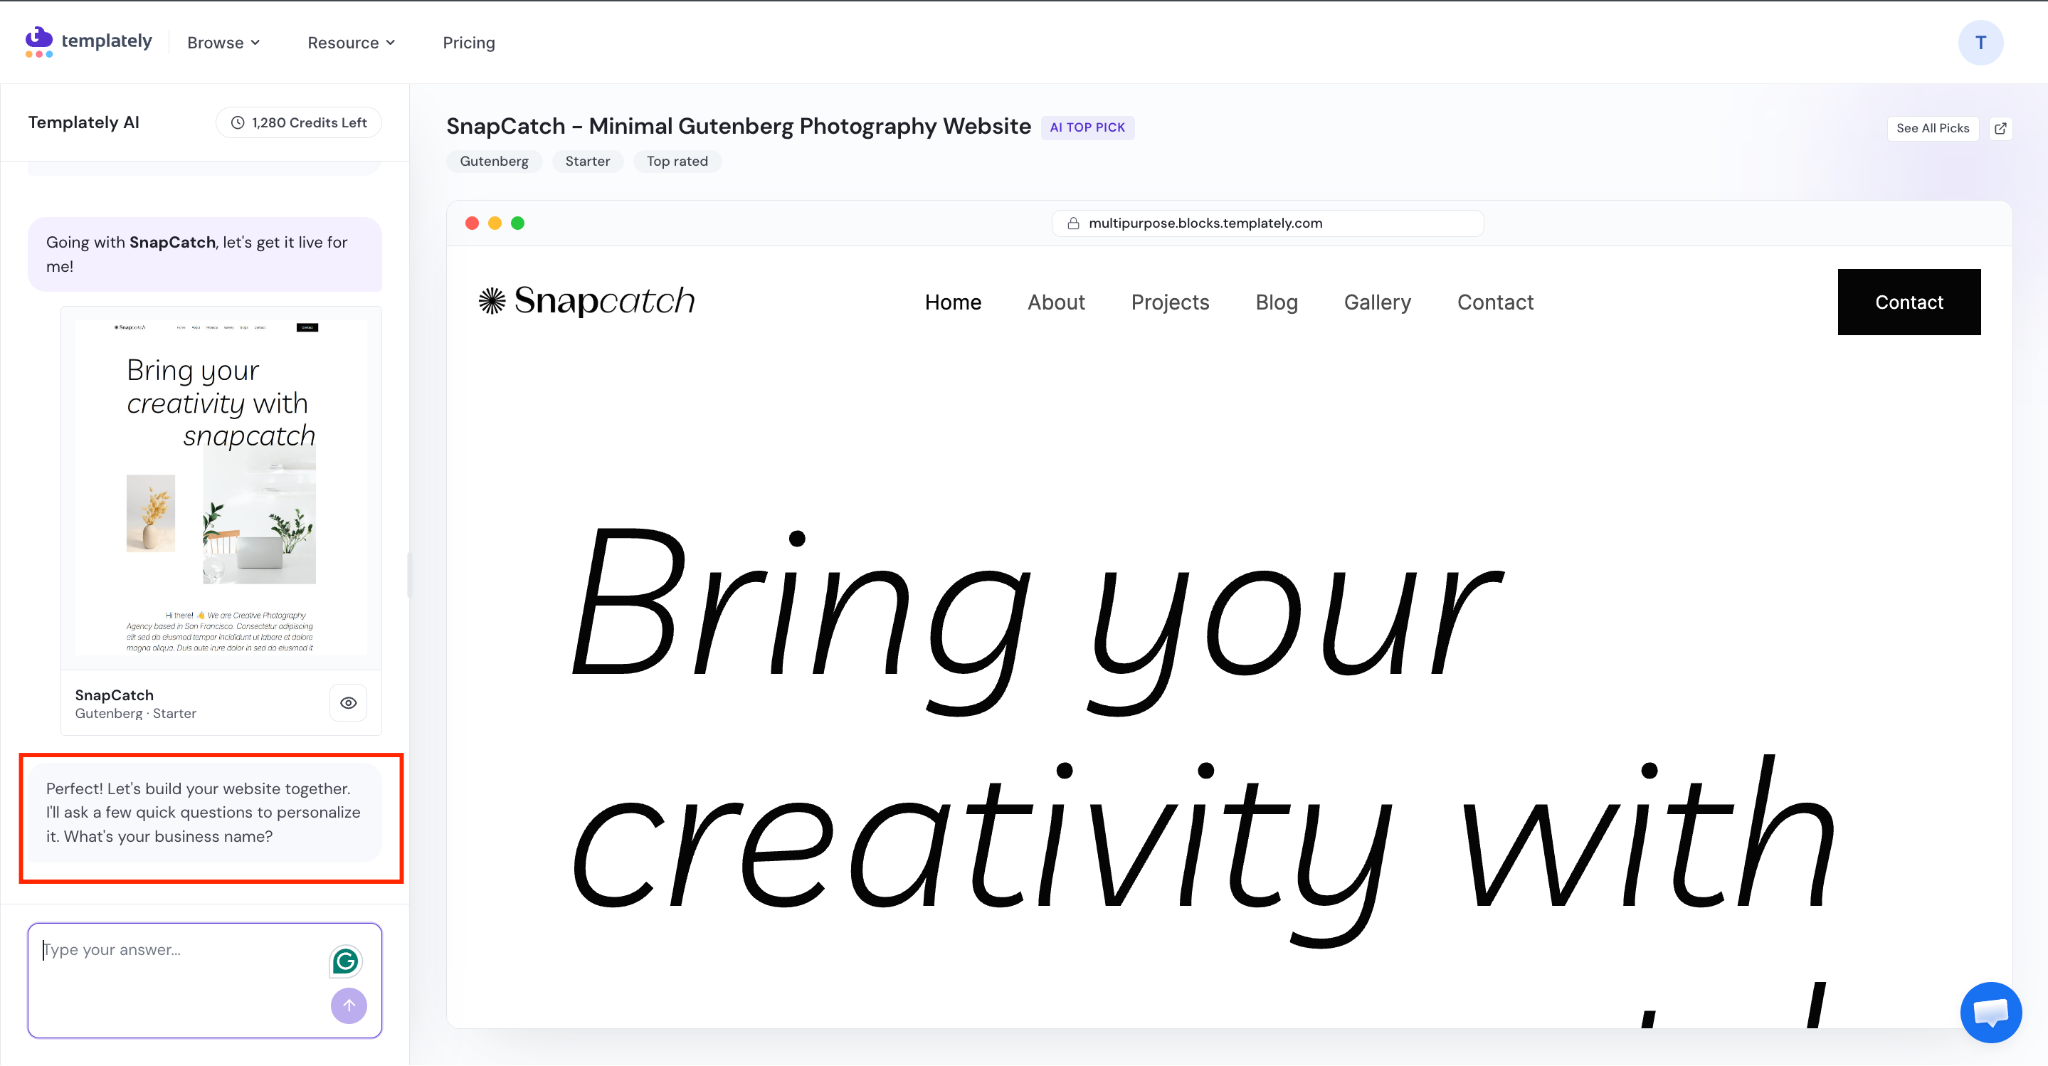
Once you’ve selected a template, Templately AI walks you through the same content generation process available in the WordPress dashboard flow. To learn how to generate content and replace images with AI, check the documentation
Step 4.1: Add Your Business Name #
The chatbot will ask, ‘What is Your Business Name?’ Type your business name in the answer. If you are creating a portfolio website, you can add your own name here instead.
Step 4.2: Select Your Industry #
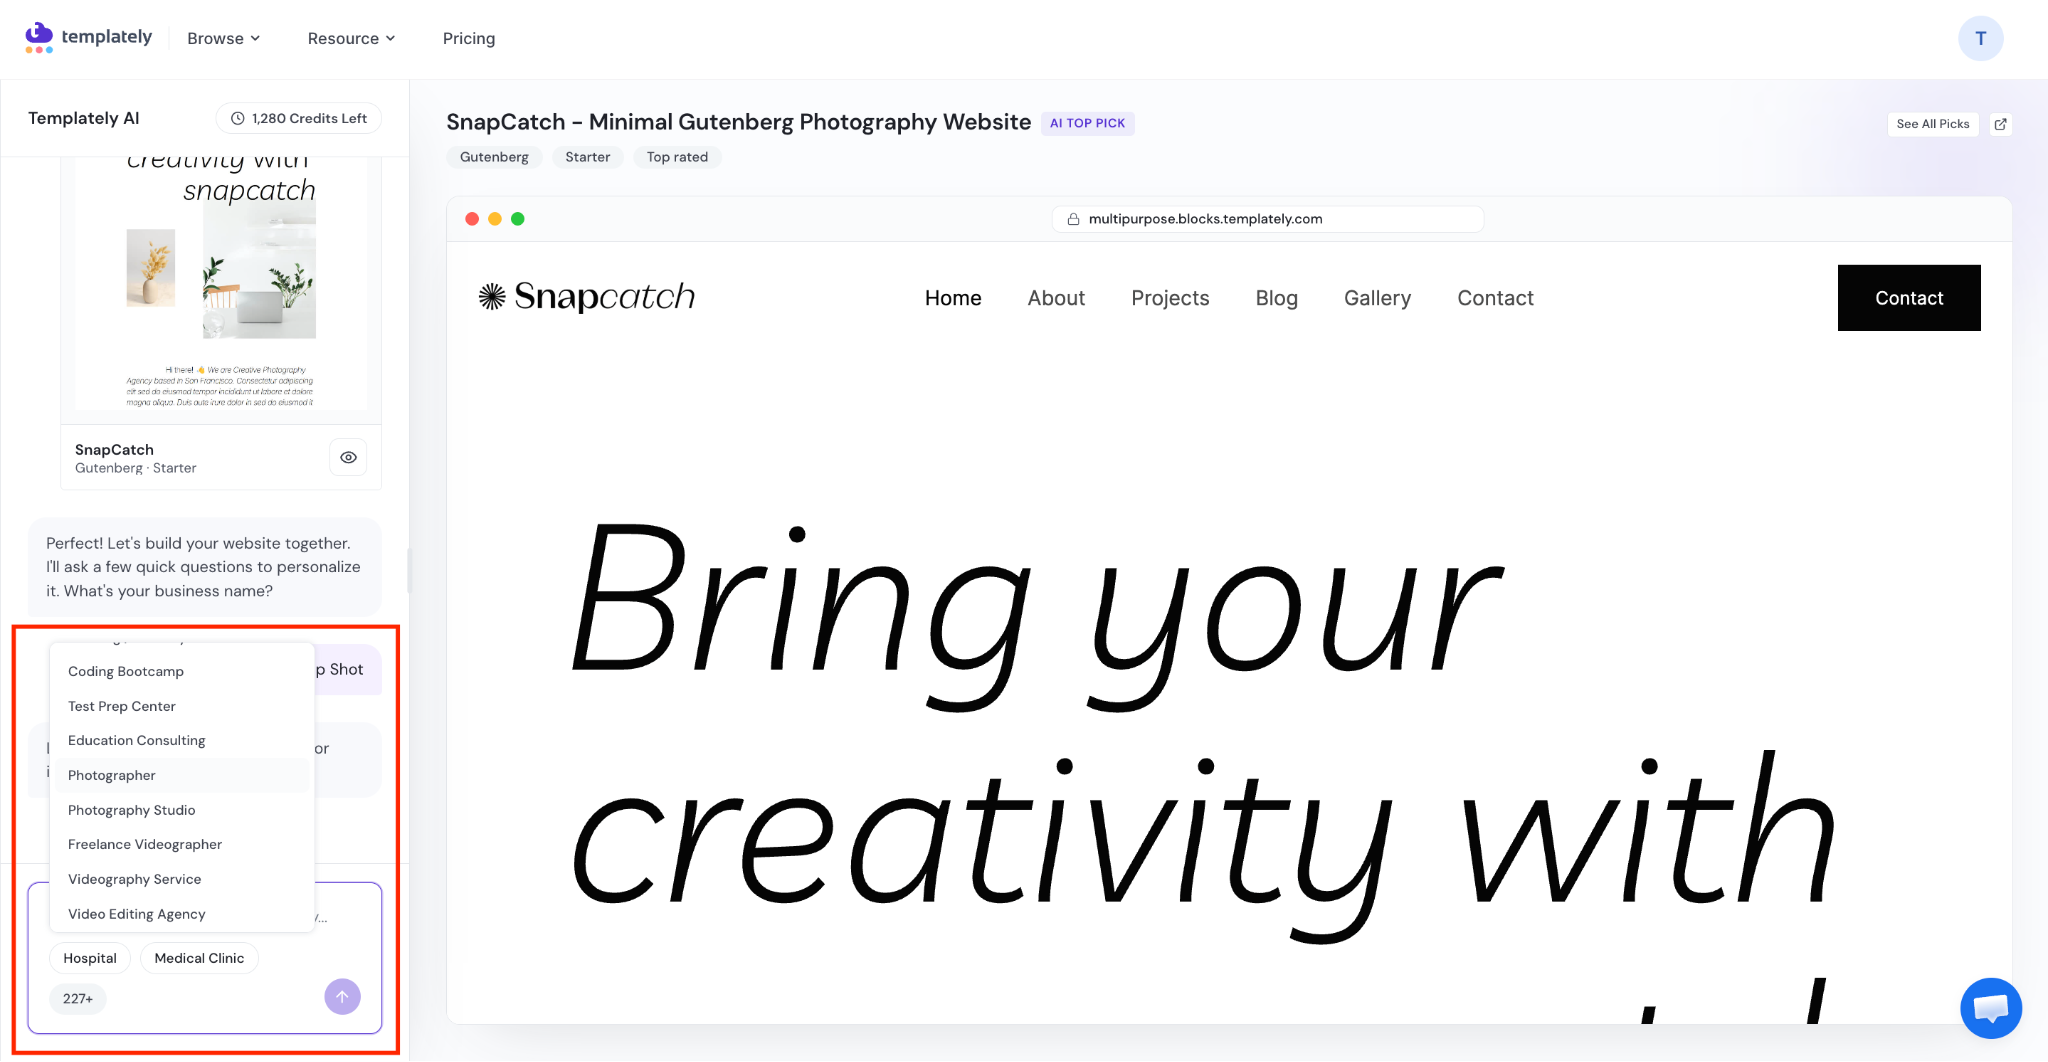
Next, define which industry your business belongs to. You will find suggested industry names in the conversation; pick one from the options, or type in your own.
Step 4.3: Add Business Details #
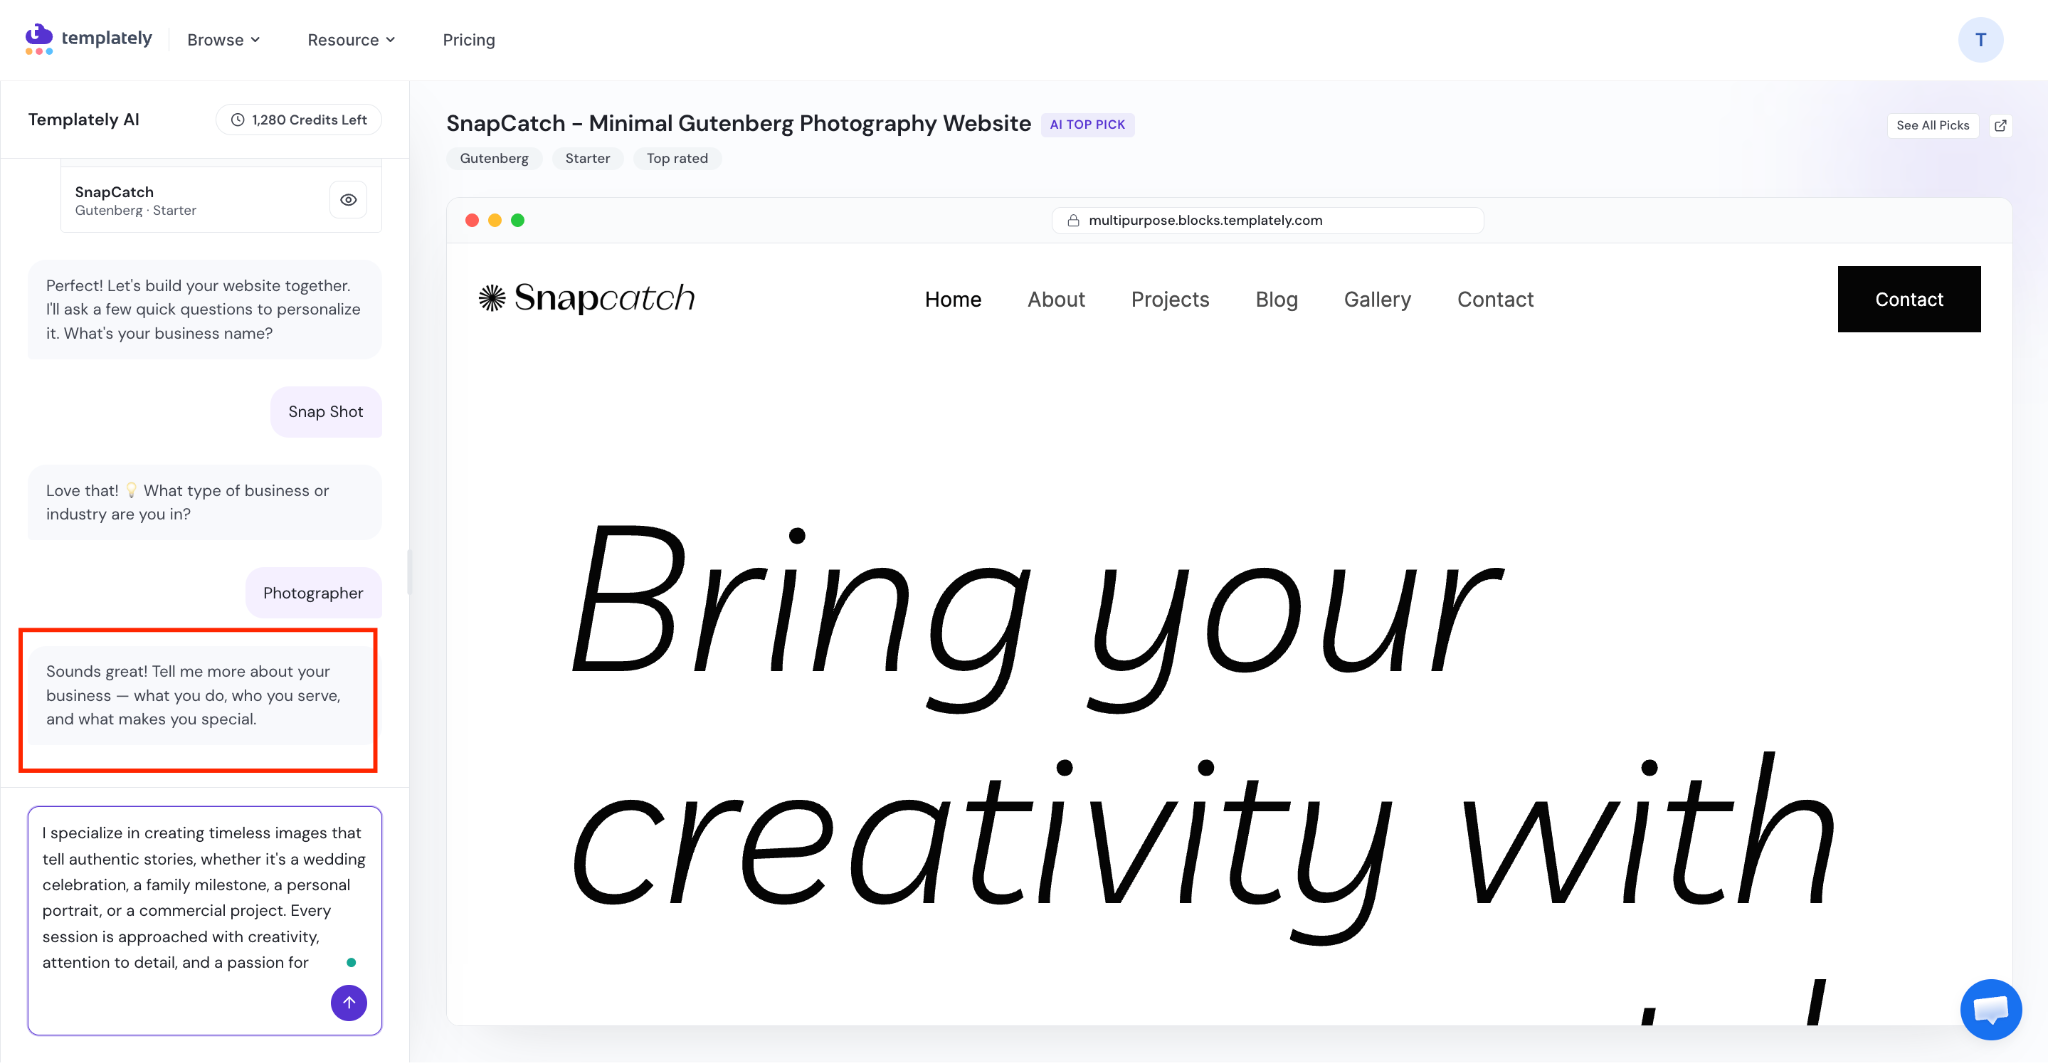
Give a detailed description of your business. Specify what it actually does; for example, if it is an agency, mention whether it’s a digital marketing agency, a study-abroad agency, and so on. The more specific you are, the more relevant the generated content will be.
Step 4.4: Add Your Email Address #
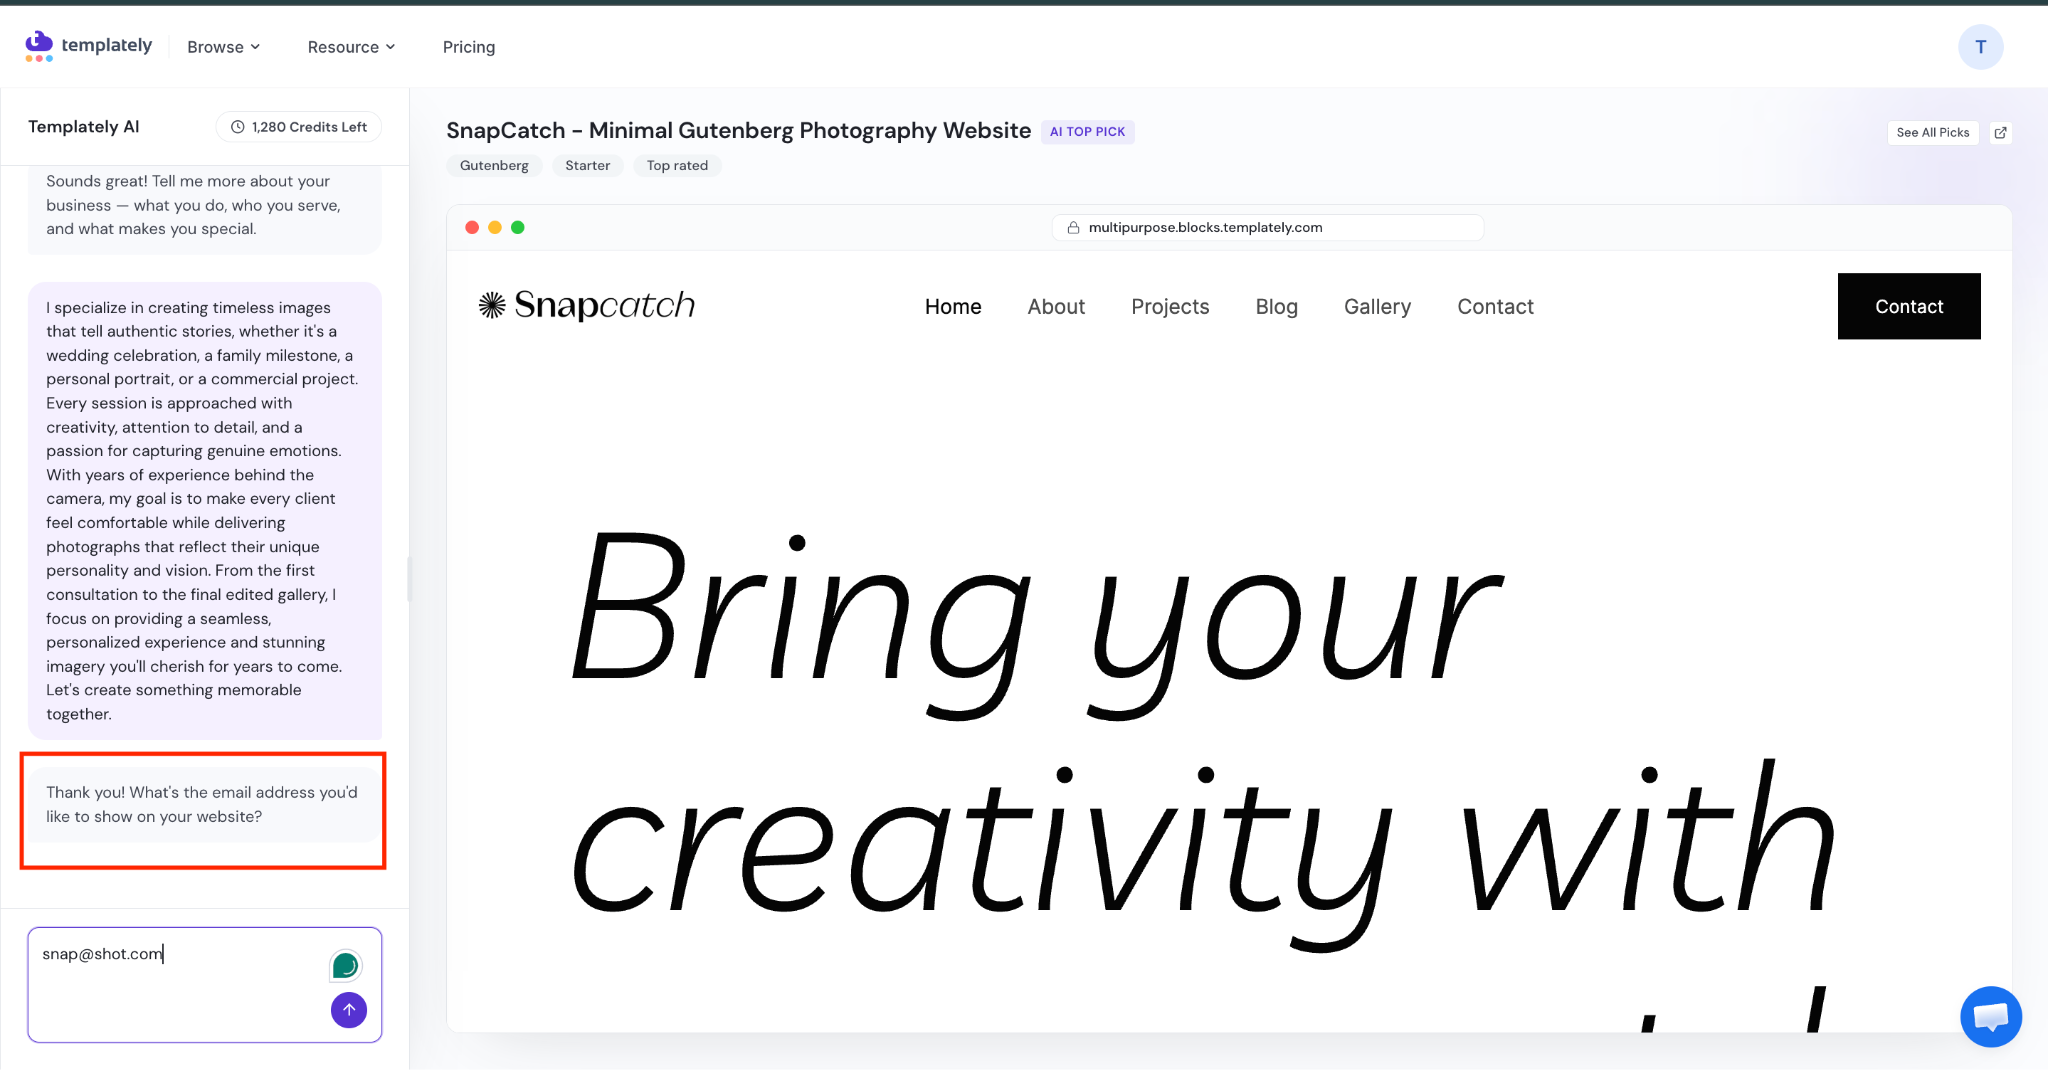
Add the email address you want visitors to use to contact you. This gets placed in your website’s contact section.
Step 4.5: Add Your Contact Number #
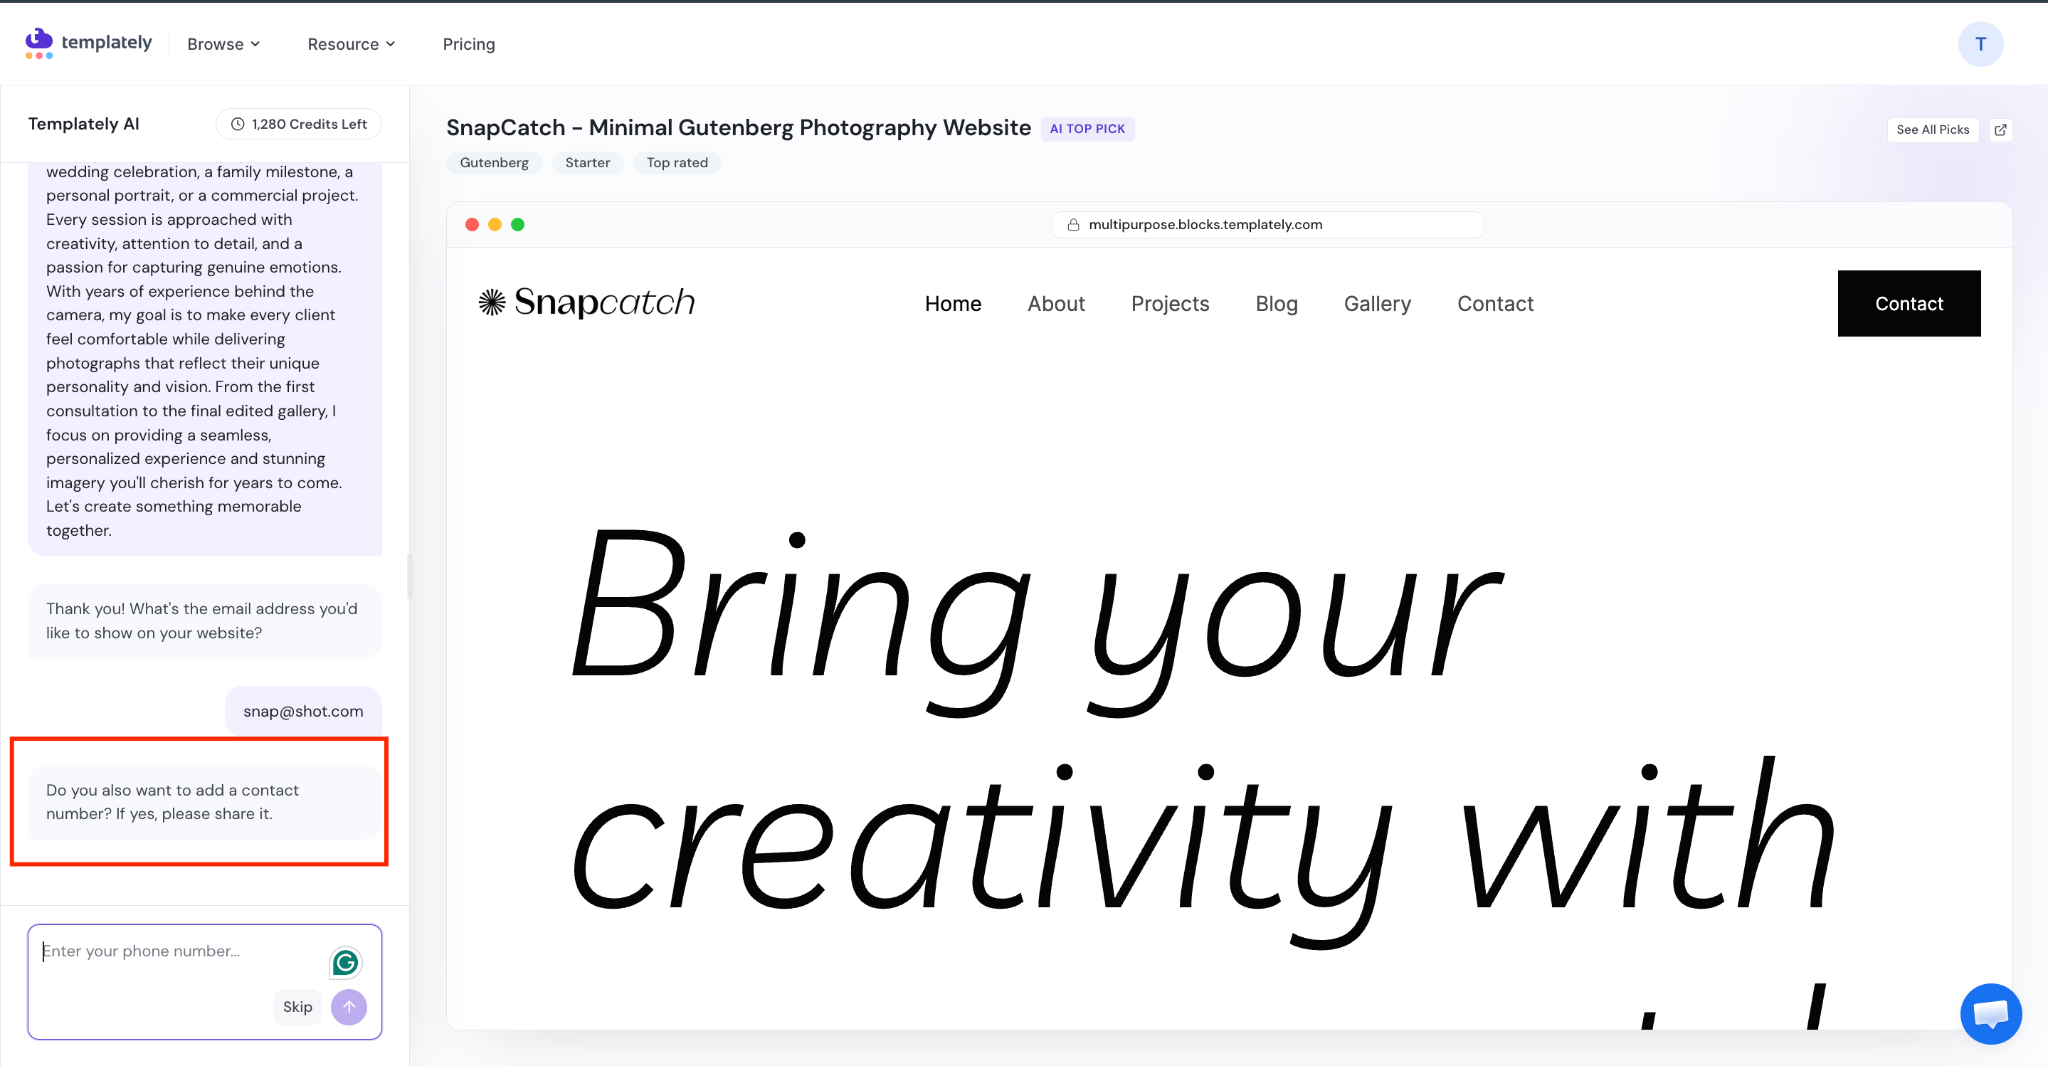
You’ll be asked whether you want to include a contact number. Add it if you do, or click ‘Skip’ if you don’t want to share one.
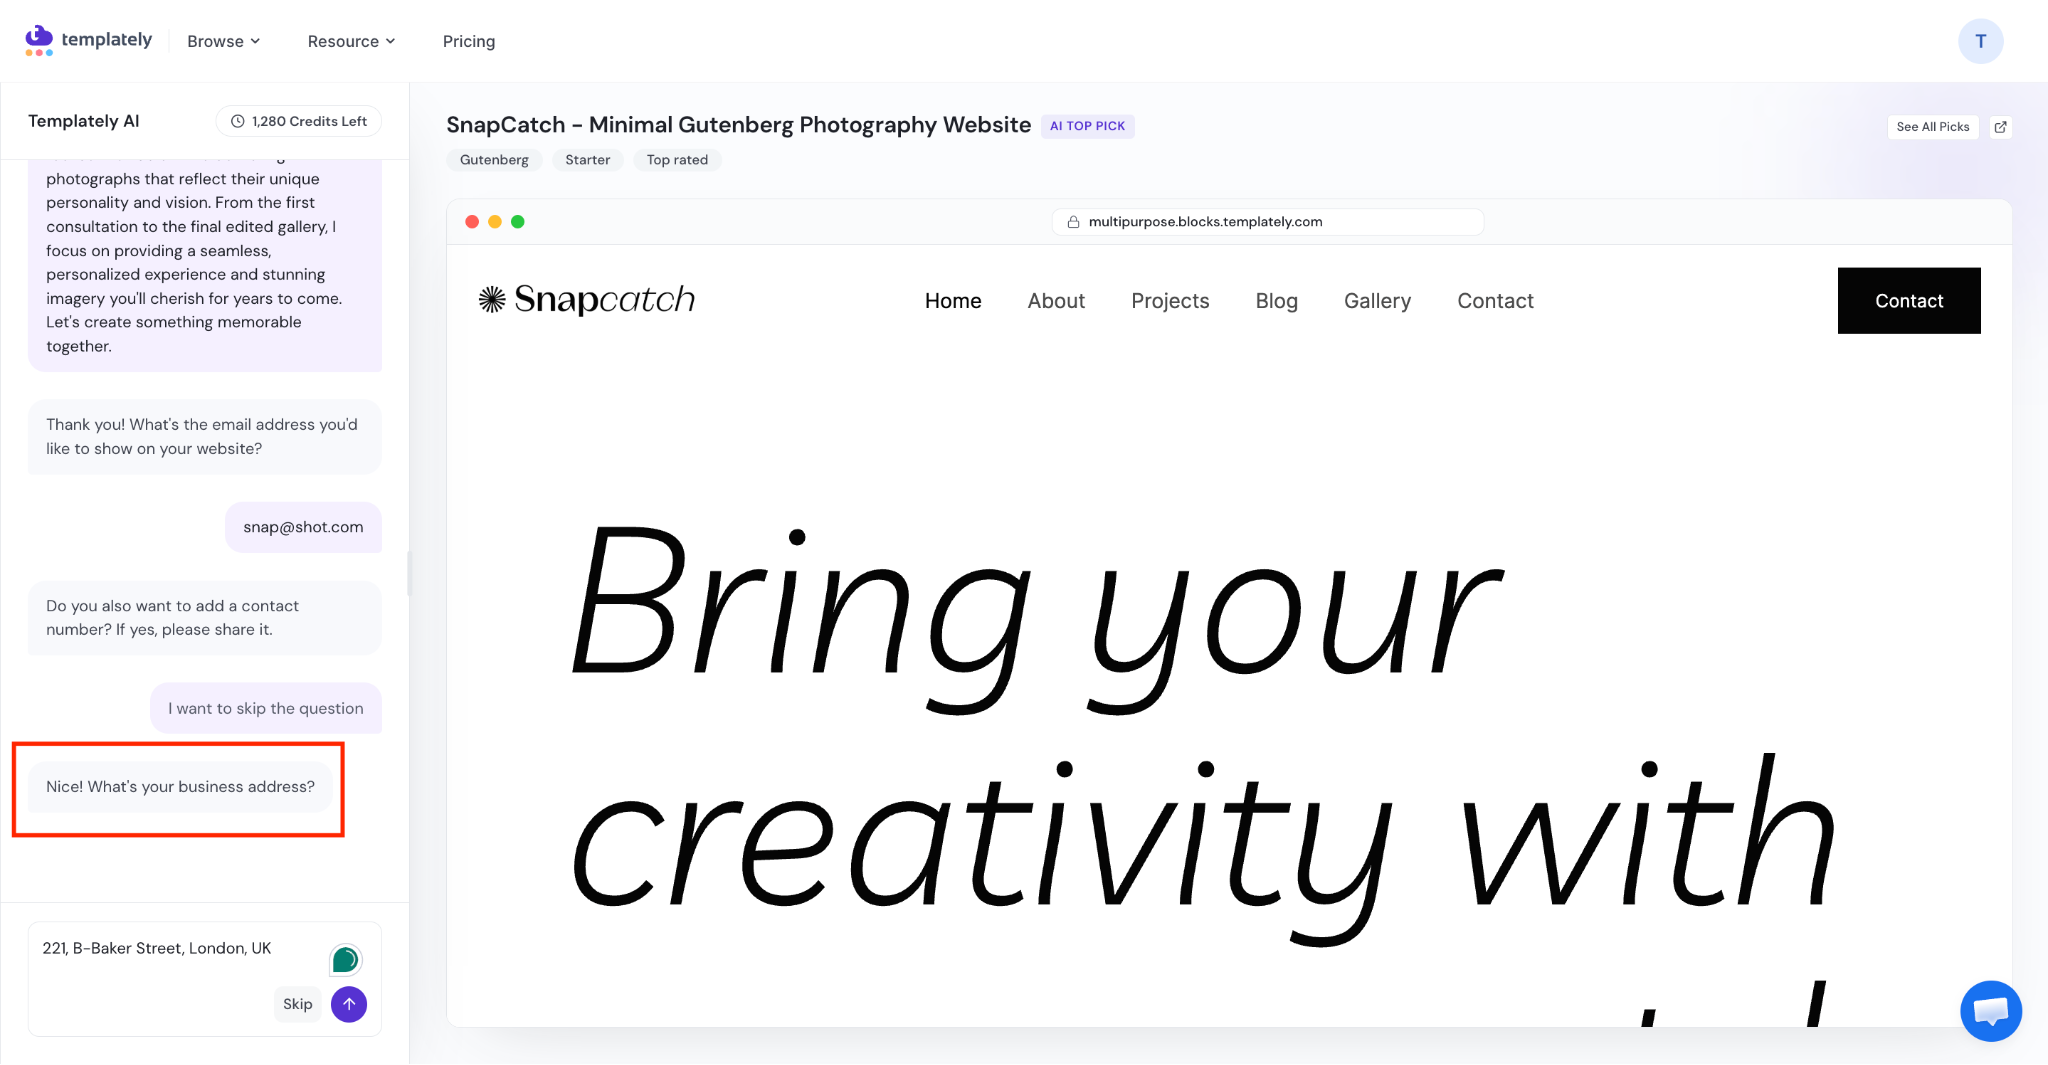
Step 4.6: Add Your Business Address #
Add your business address if you have one. Otherwise, click ‘Skip’.
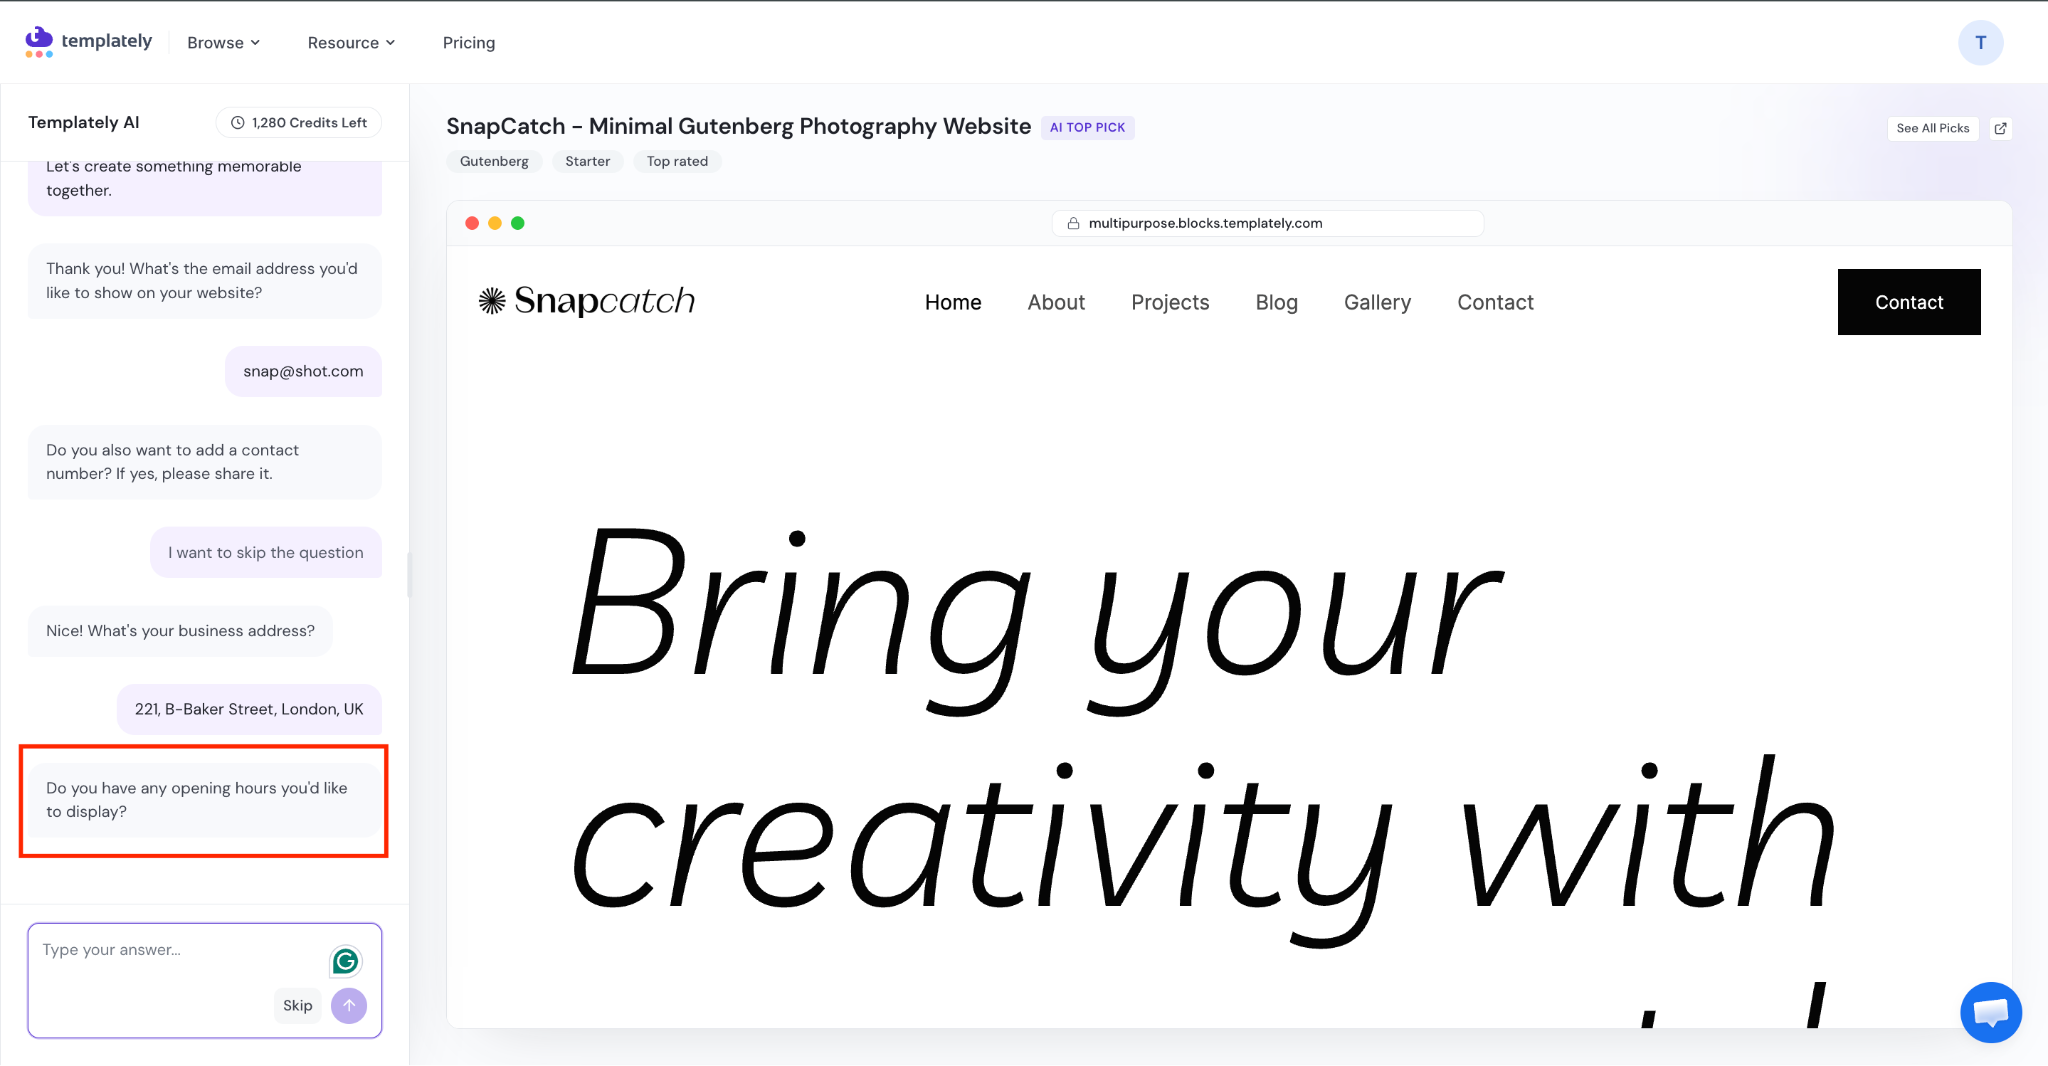
Step 4.7: Add Your Opening Hours #
If your business has specific operating hours, add them here in detail. If not, click ‘Skip’.
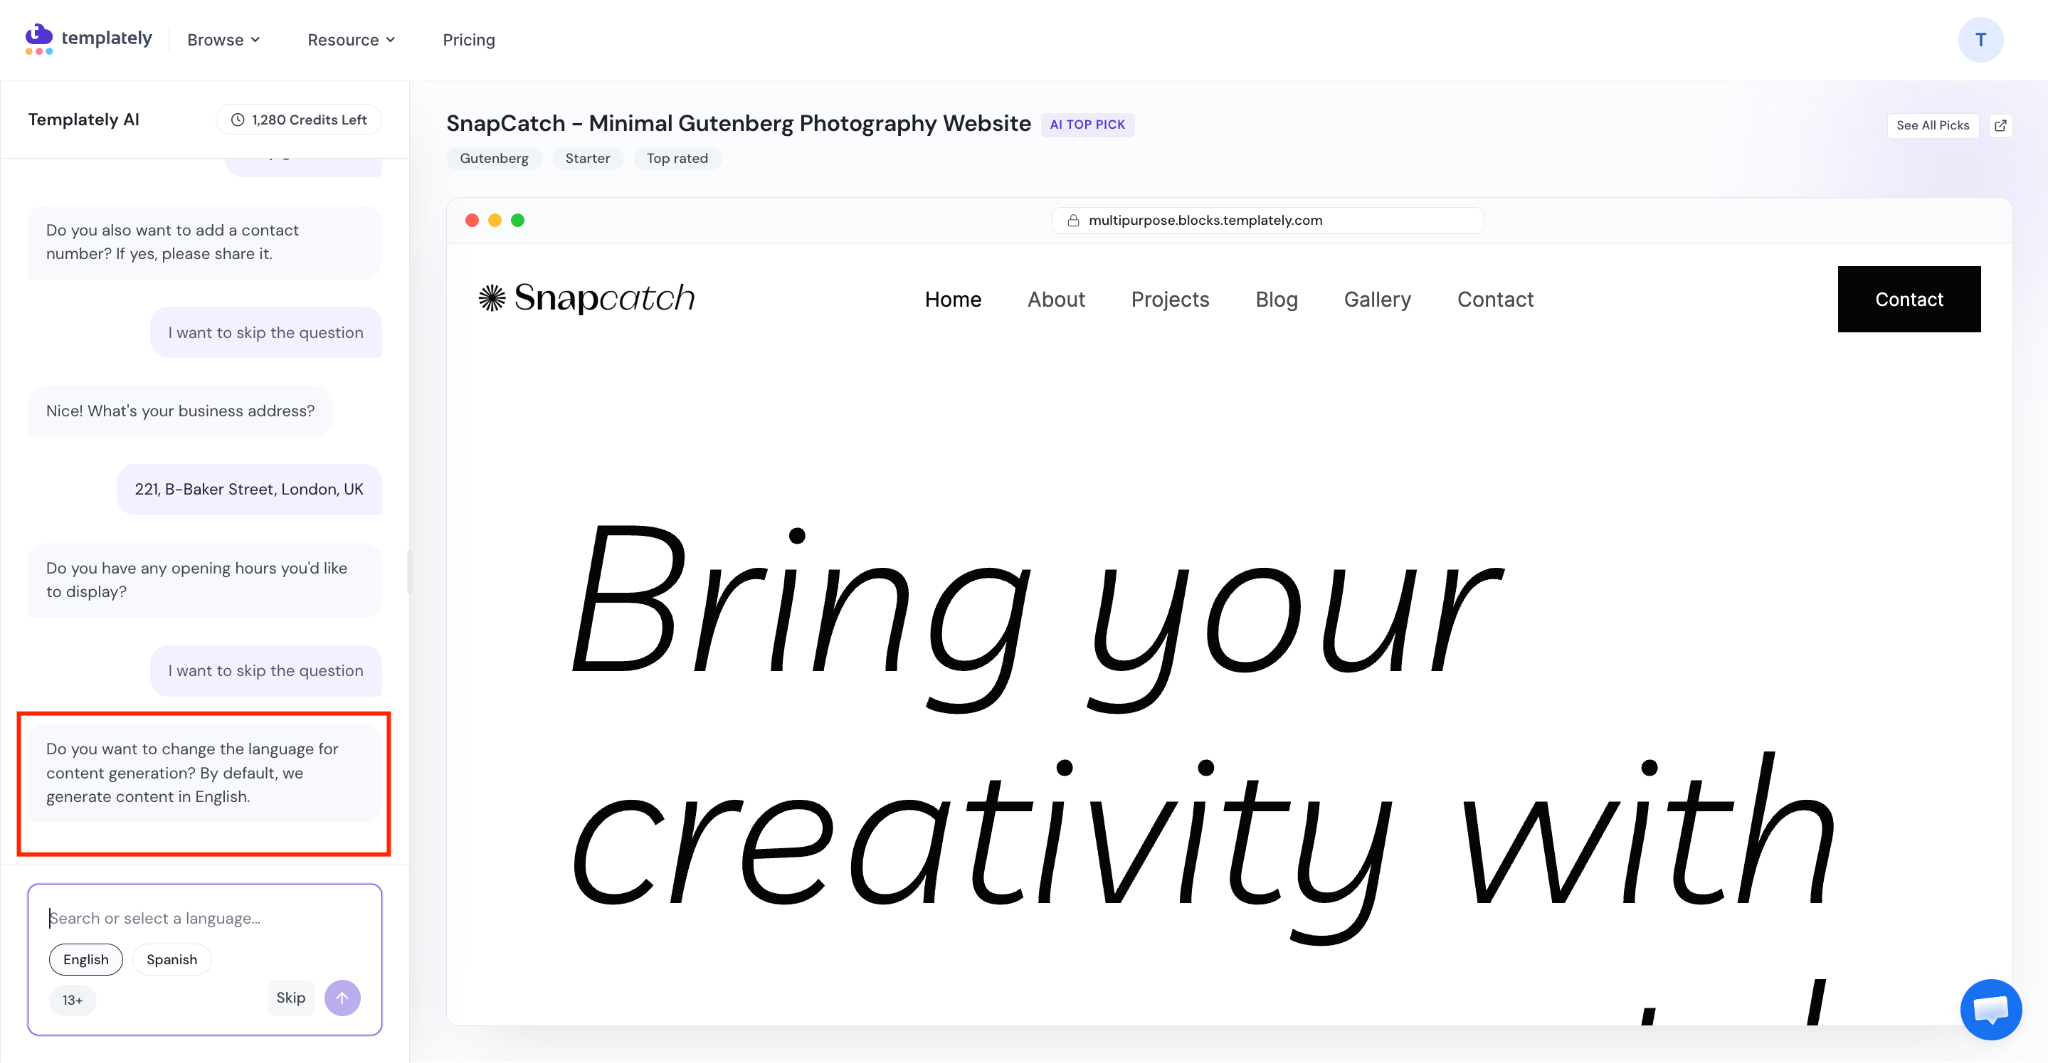
Step 4.8: Select Your Language #
Next, choose the language you want your website content generated in. Pick from the available language options in the chat, so the AI generates all your copy in your preferred language from the start.
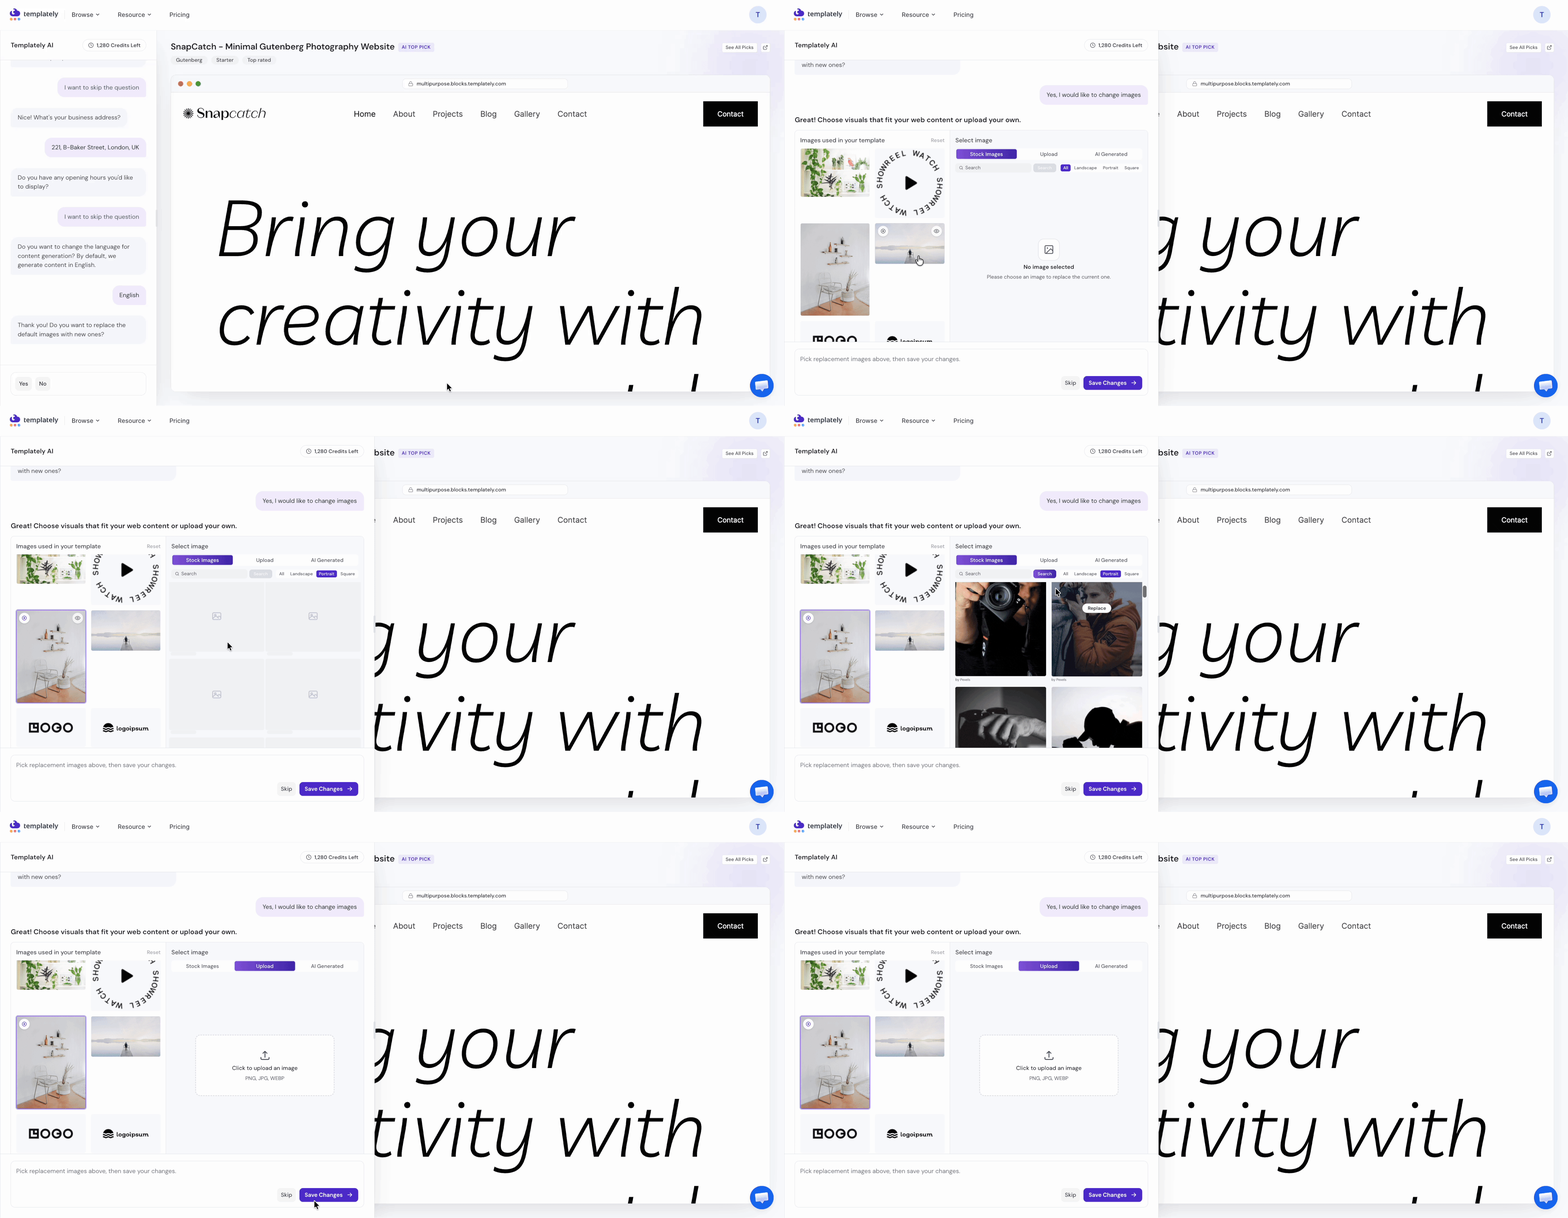
Step 4.9: Replace Images with AI #
After answering all the questions, you will get a confirmation prompt to generate content based on your answers. If you are unsure, click ‘How should I pick?’ for a demo sample.
If you also want to replace the template’s placeholder images, click ‘Yes’. Then select the image(s) you want to replace, and choose a replacement from stock photos or your own uploaded files.
Step 4.10: Save and Generate #
Click ‘Save Changes’ to confirm your image selections. Then click ‘Generate and Proceed’ to generate your full website content and replace the images with AI.
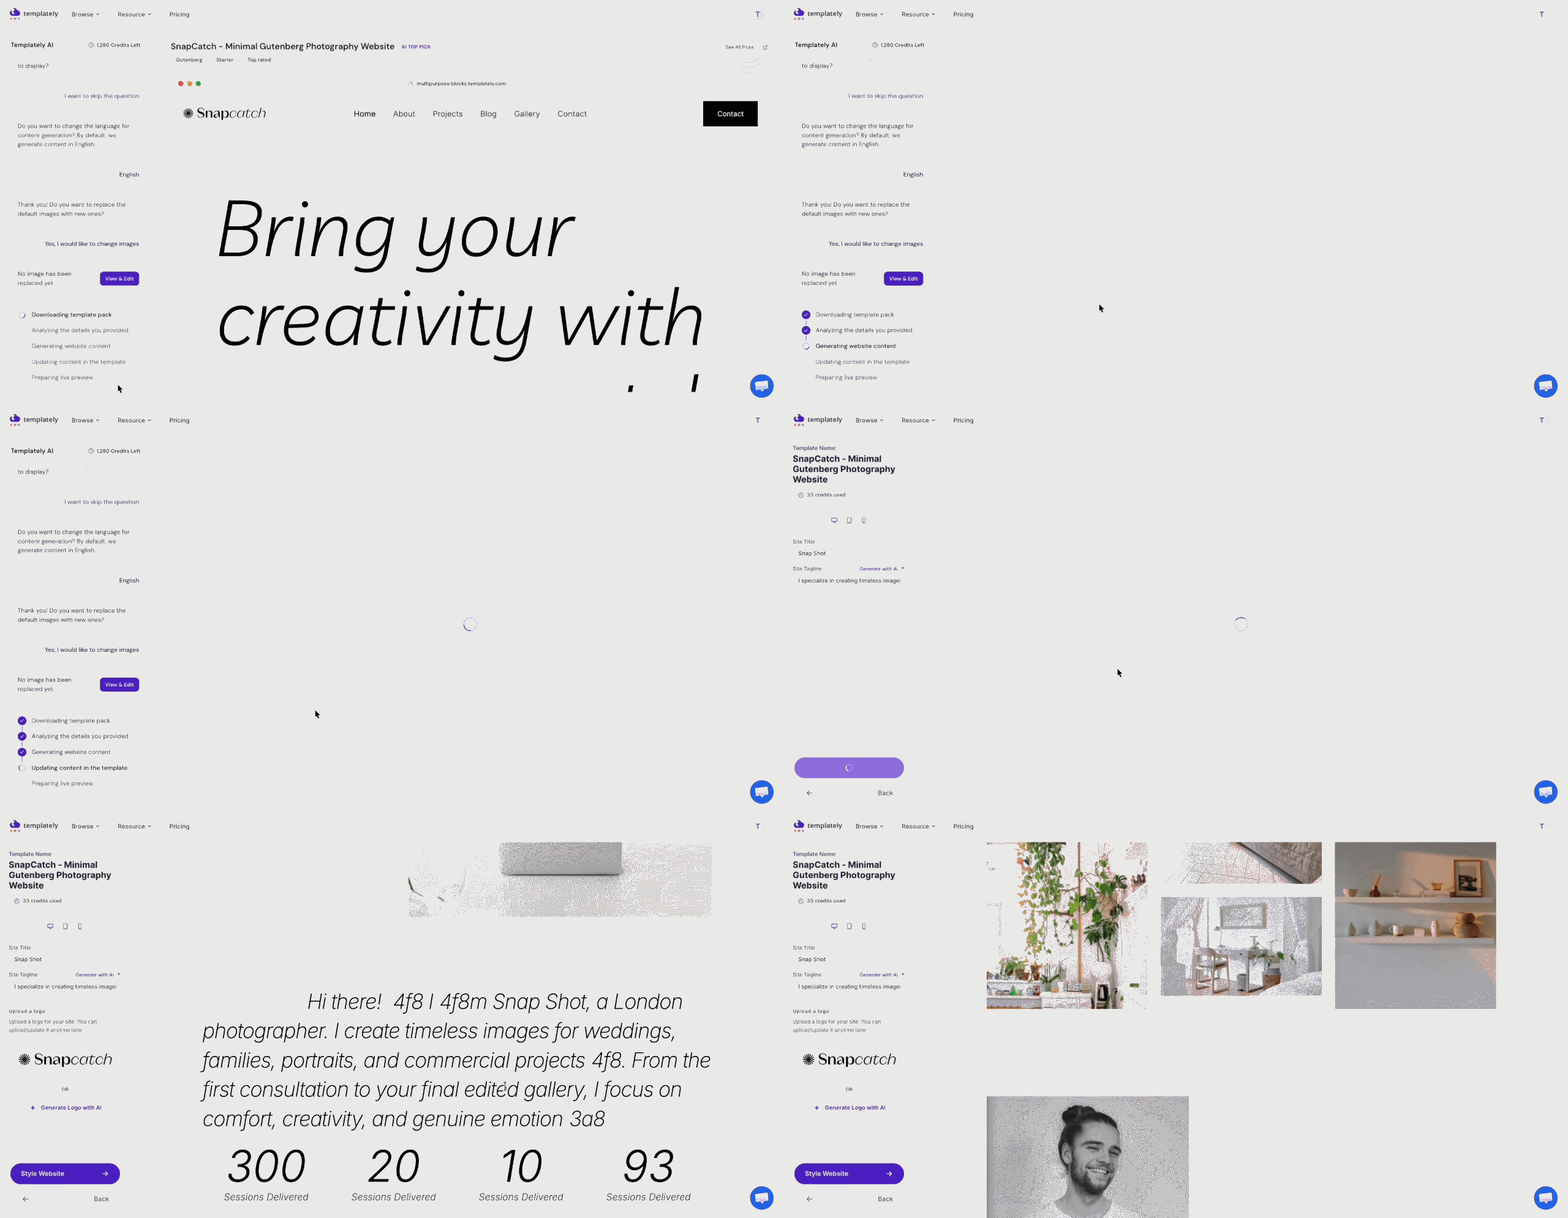
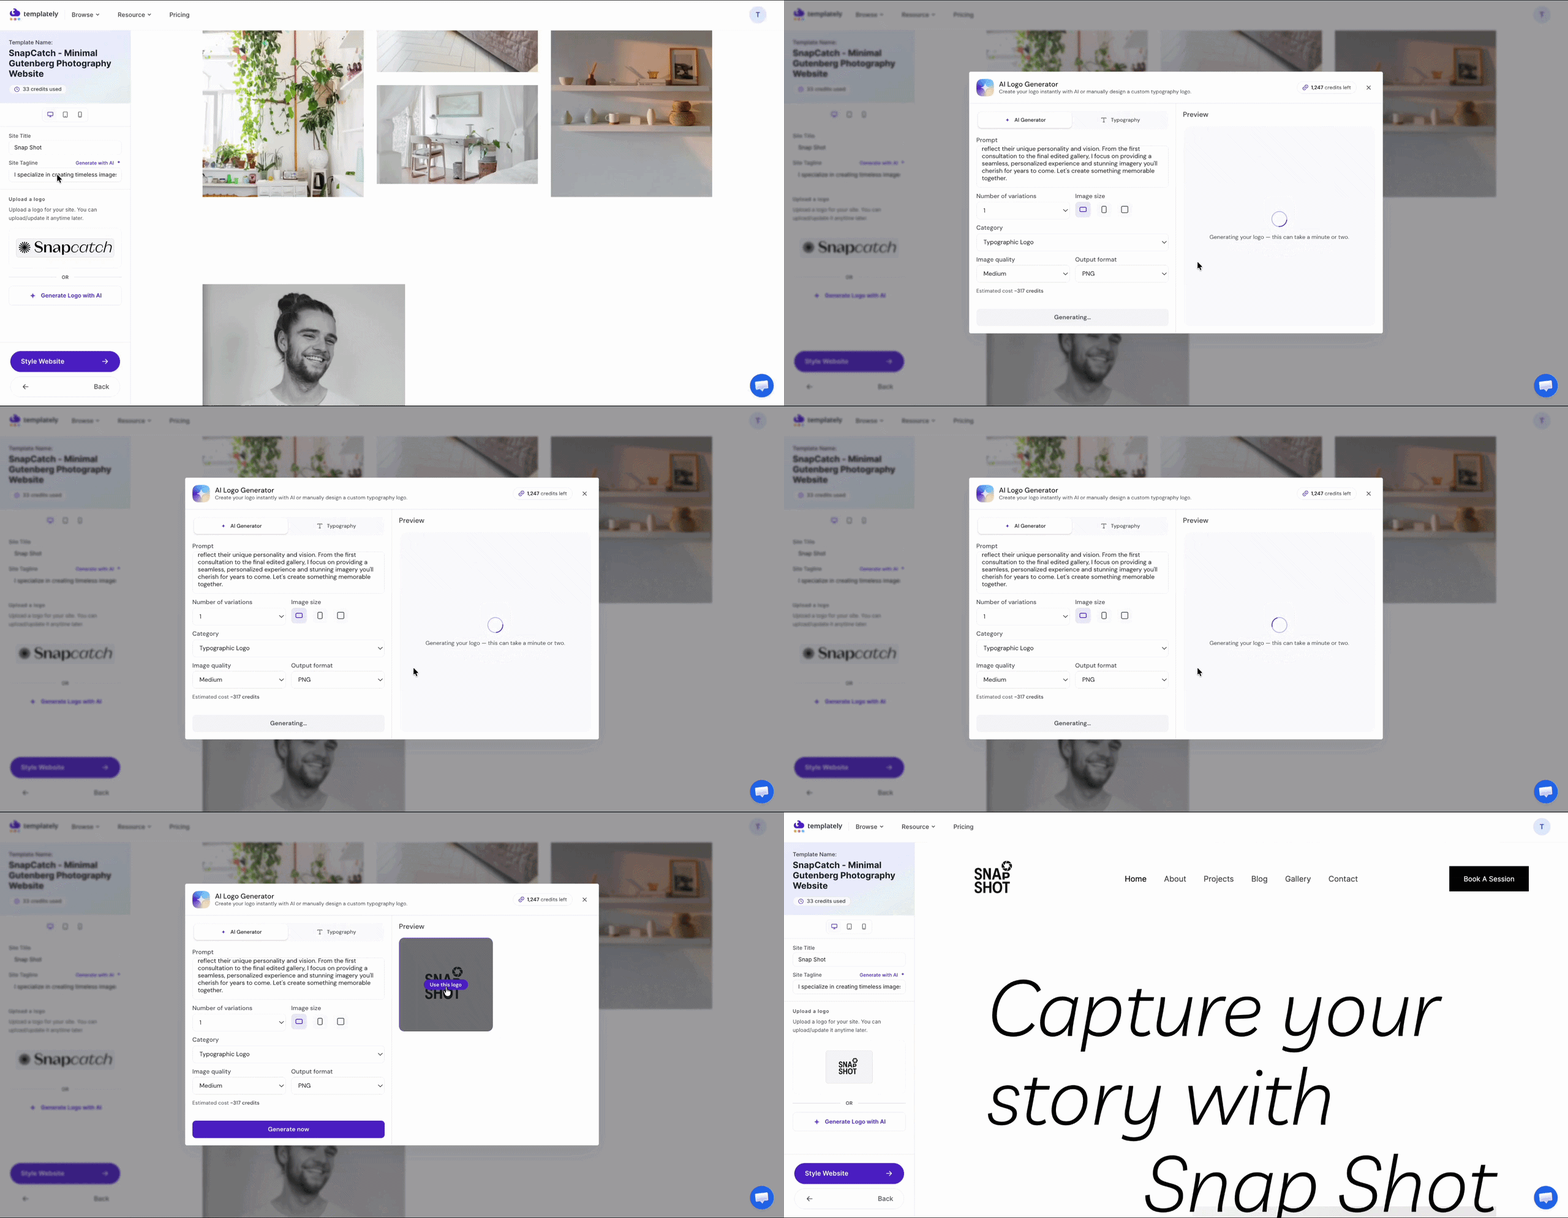
Step 5: Generate Logo with AI #
Next, click ‘Generate Logo with AI’. A window opens where you can enter a prompt describing your logo, then choose variations, category, image size, quality, and output format. Click ‘Generate Now’, review the results, and click ‘Insert’ to add the logo to your website automatically. You can resize it afterward as needed.
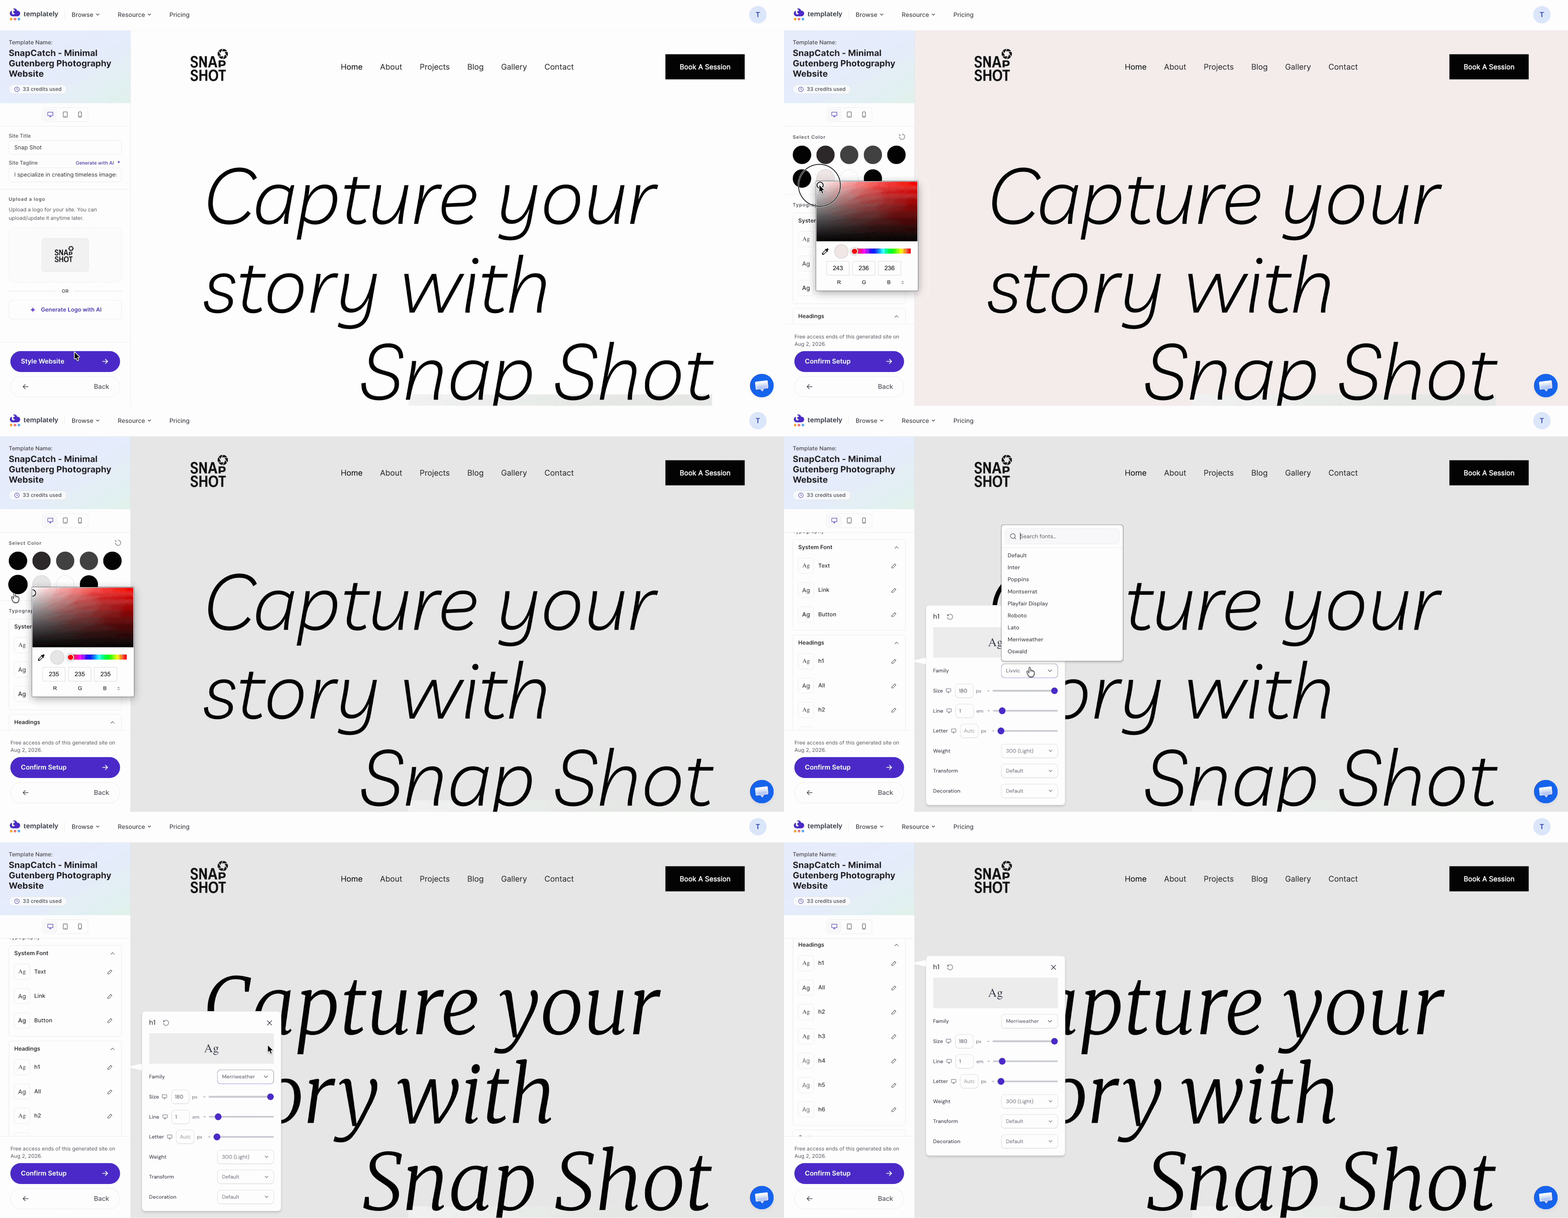
Step 6: Style Your Website #
Once your content, images, and logo are in place, move to the styling step to adjust your website’s overall look, colors, typography and layout to match your brand before going live.
Step 8: Connect Your Site #
Finally, connect your newly generated website to your live site. Once connected, your AI-generated website, complete with content, images and logo, goes live on your domain.
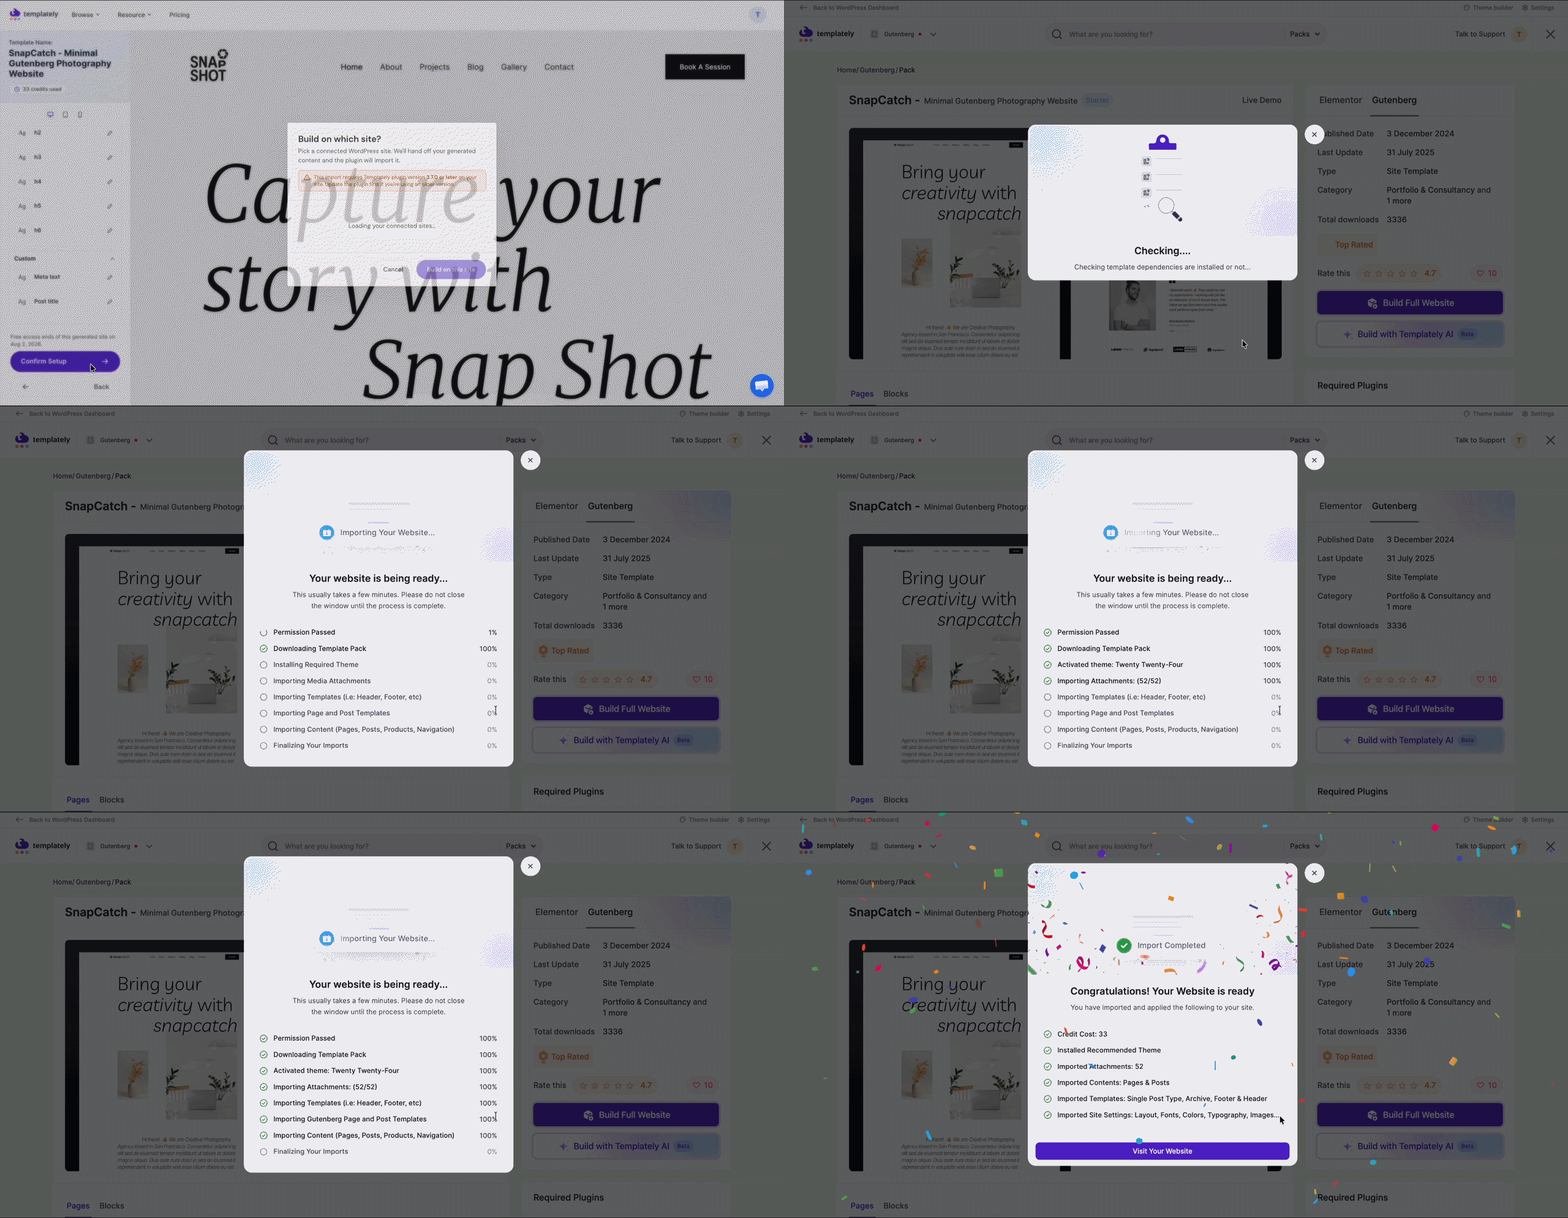
Final Outcome #
Once connected, your fully AI-generated website, content, images, logo and styling are live and ready for visitors, built end-to-end from a single prompt inside the Templately App.

This is how, with the help of Templately’s AI-powered app workflow, you can go from a single prompt to a complete, live website in minutes.
Getting Stuck? Feel free to contact our Dedicated Support Team.